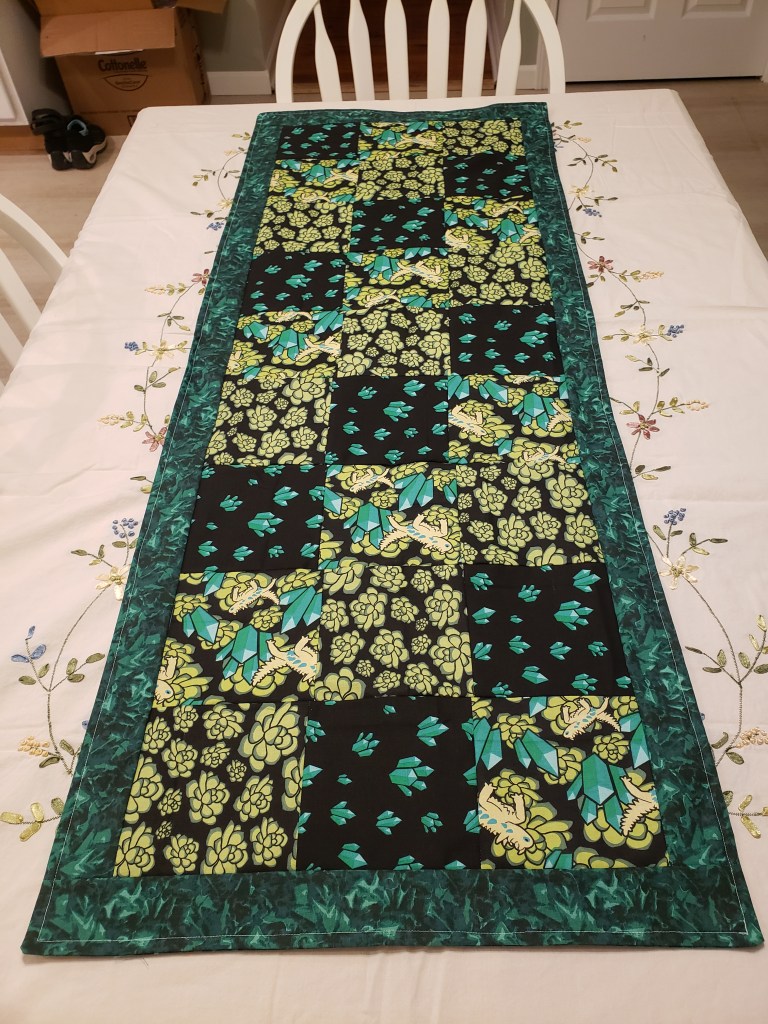
Hello there friends! Today I’m bringing you a fun one! Or at least… I think it’s fun. And my husband did too. This was his birthday present a couple years ago.
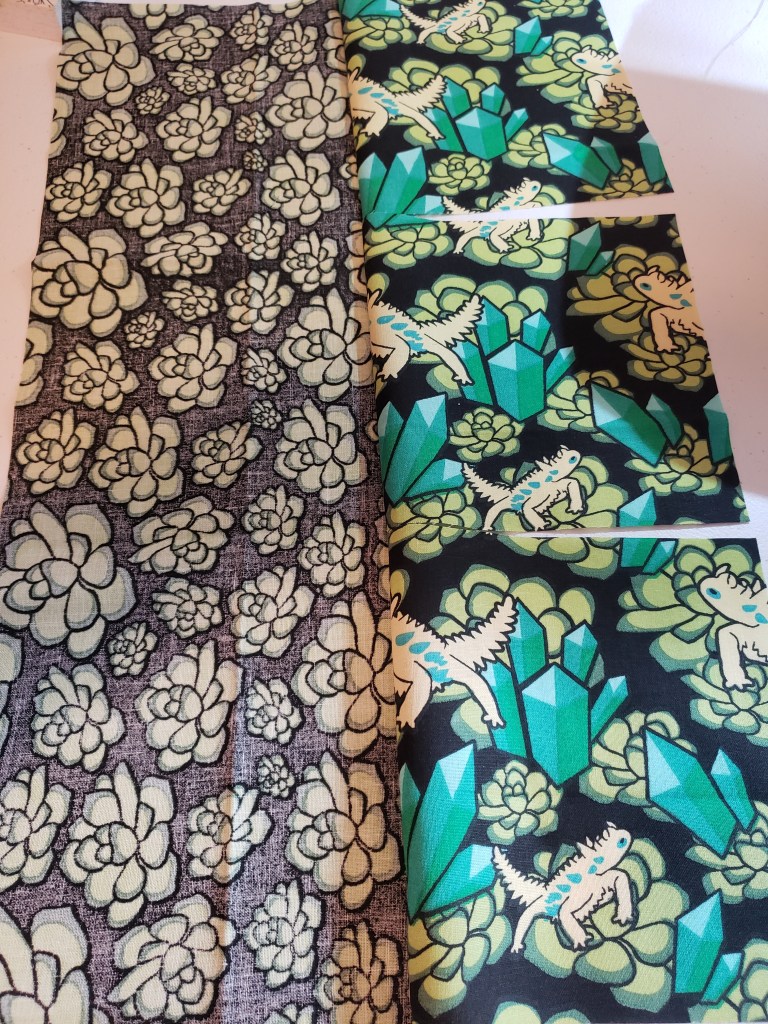
I used a few fat quarters in three different prints (crystals, succulents, and crystal/succulents with lizards). Fat quarters are a piece of fabric you can get from your local craft store that usually come in about 18 x 20 inch (45.72 cm x 50.8 cm) sections. I planned for 9 squares out of each fat quarter and sketched them on a piece of scratch paper in a pattern that I thought would look good. In hindsight, I think the two succulent fabrics were probably a bit much, and I probably should have picked a different third fabric. But my husband liked these three and wanted something made with them.
Once I had my pattern decided on, I cut 9 squares of my first fat quarter. After that, it was time to start stripping!
No! I don’t mean in a bad way. It’s a quilting technique where you work with most of the fabric in strips. So I took my precut squares (in this case I started with the lizard fabric) and I laid them right-sides-together with a strip of fabric that I cut the width of the squares. (The picture here is actually one I had rip the stitches out because I sewed them backwards… oops!) You do want to make sure to leave a space in between each of the squares as you sew along the sides. After all your squares are stitched to the strip, you just have to cut the strip side between your squares. Voila! You have two squares stitched together!
Now you just have to repeat that for all 9 squares… and then again with the final fabric print… But you also have to take into consideration you pattern… Which is probably the hard part. I worked mine going in a diagonal, so I had a lot of notes on scratch paper about what fabrics I needed attached to what other ones and how many I needed… I may have had to rip out stitches a few times to get it to look right.
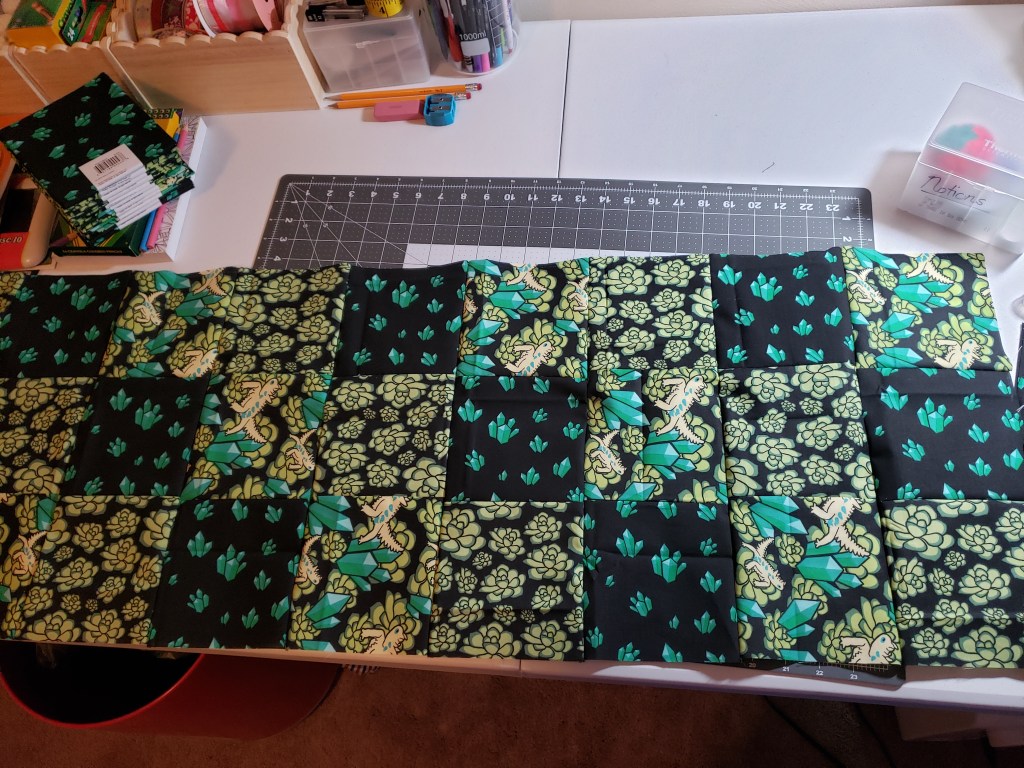
At this point, you’ll have 9 pieces with three squares arranged in a line. From here it’s MOSTLY just making sure you lay them out in the right pattern and stitching down the center seams to get it to look nice.
This part was actually relatively easy considering the rest of the mess I had just finished up with.
Now for the trim and backing. This wasn’t too bad. I opted to cut myself a few 2 inch strips and started with a short end. I used something similar to the stripping method. I stitched my strip of fabric to the short side, cut it at the end, turned the piece, and stitched the same strip down the long side. And then rinse and repeat the other two sides. This is similar to what you would do when sewing a log cabin quilt (which I haven’t done yet, but I would like to… eventually).
The last part for me was to cut out the back piece and get that sewn on. For this, I laid my backing out face up on the floor and laid my top out face down on top of it. I pinned the sides down (I prefer long quilting pins even though I don’t do much quilting), and then I simply cut around the edges to get my backing.
I stitched around the outside of the table runner leaving a 2-4 inch gap for turning it inside out, and trimmed the corners on an angle. You want to trim the corners to help them lay flatter when you turn it. Once it was turned inside out, I believe I did a blind seam to close it (I don’t remember). I think adding a blind seam just gives it a cleaner look in the long run, but you don’t have to. Because the last thing I do for pieces like this is to do a top stitch around the outside edge to help it lay nice.
I think I’ve mentioned before that I’m not a professional quilter or seamstress. But I think this turned out pretty good. I do have other fabrics that I want to use to do a similar pattern, but I haven’t had the time to do that yet. I’ll update if/when I do. 🙂
I’d love to hear your thoughts, comments, concerns, or questions!
Thanks for tuning in! Until next time! – Jo

Leave a comment