February is the month where everyone is expressing their feelings and showing people how much they care. Mostly because of Valentine’s Day. However, my boyfriend and I don’t celebrate Valentine’s; instead we wait a week and celebrate our anniversary when most people have stopped swarming all of the restaurants.
This year, I wanted to do something different for our anniversary. (I say ‘this year,’ but it was our first anniversary, so I guess next year I’ll have to do something even more different…) So, I scoured the internet for ideas, because what else do you do?

The end result of my search? Bacon Roses!
I’d seen the idea years ago and always wanted to try it out. And what better occasion than an anniversary? Once I had my plan, I had to figure out how to do it. The problem was that everywhere I looked had very different ideas on what should be done. So I kinda just decided to wing it…
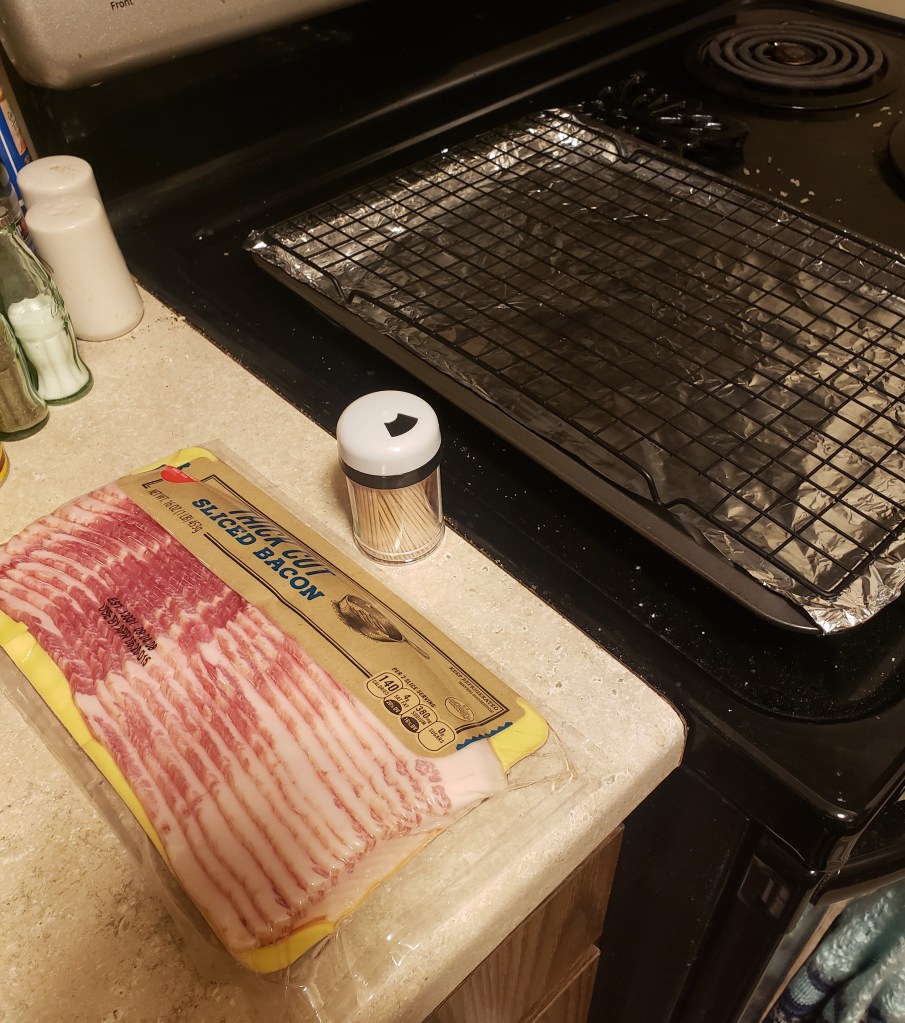
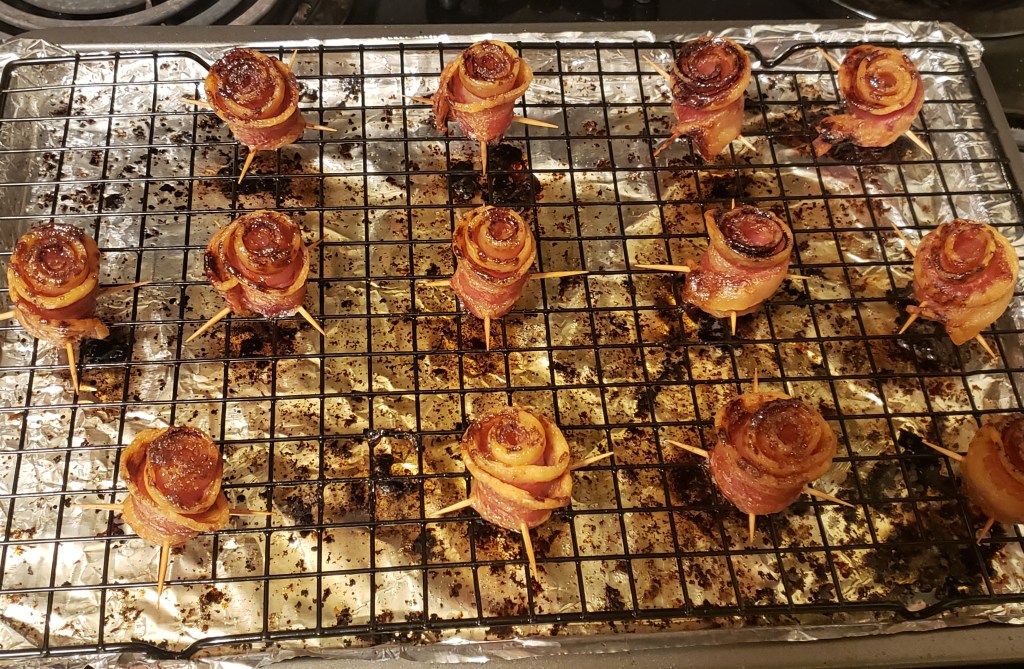
I started out with a cookie sheet lined with aluminum foil (my boyfriend always does that so that he doesn’t have to wash the cookie sheet as often) and an oven safe wire cooling rack. Oh, and toothpicks.
The idea here is that any bacon grease that drips off will fall through the cooling rack onto the aluminum, which helps it not to pool and make super greasy bacon roses.
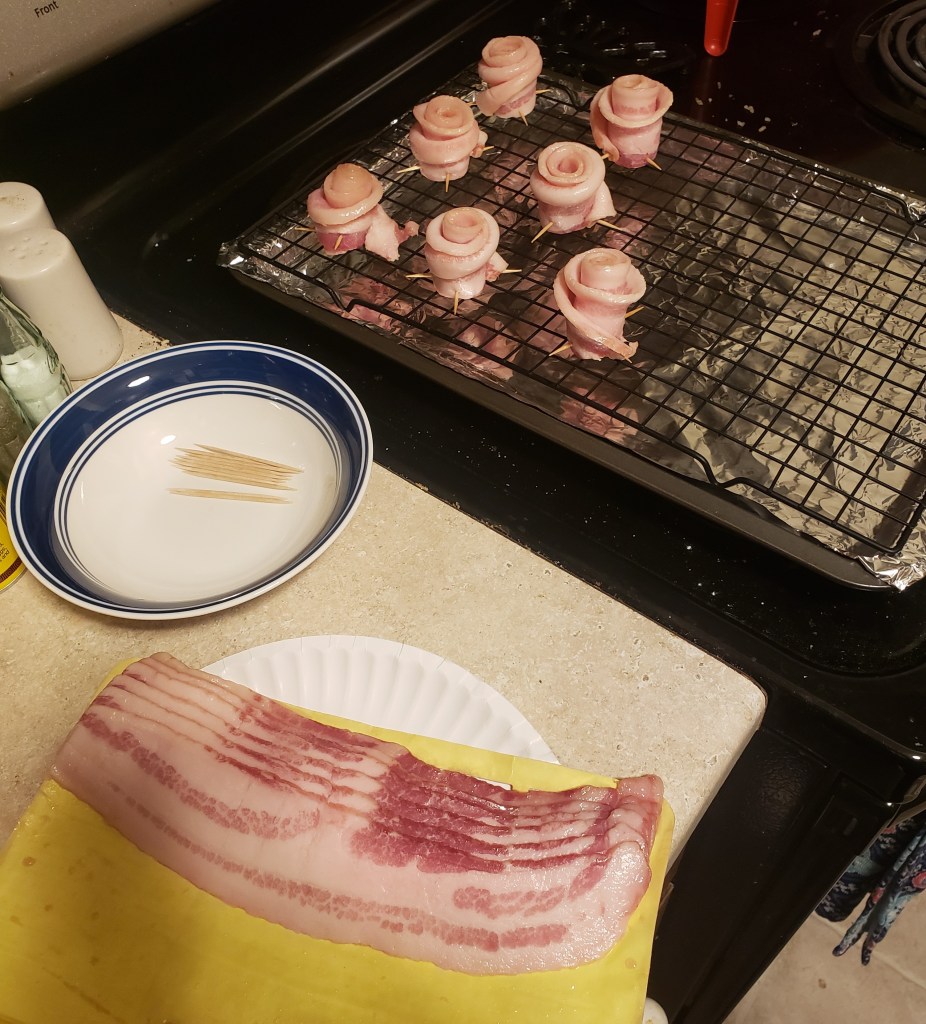
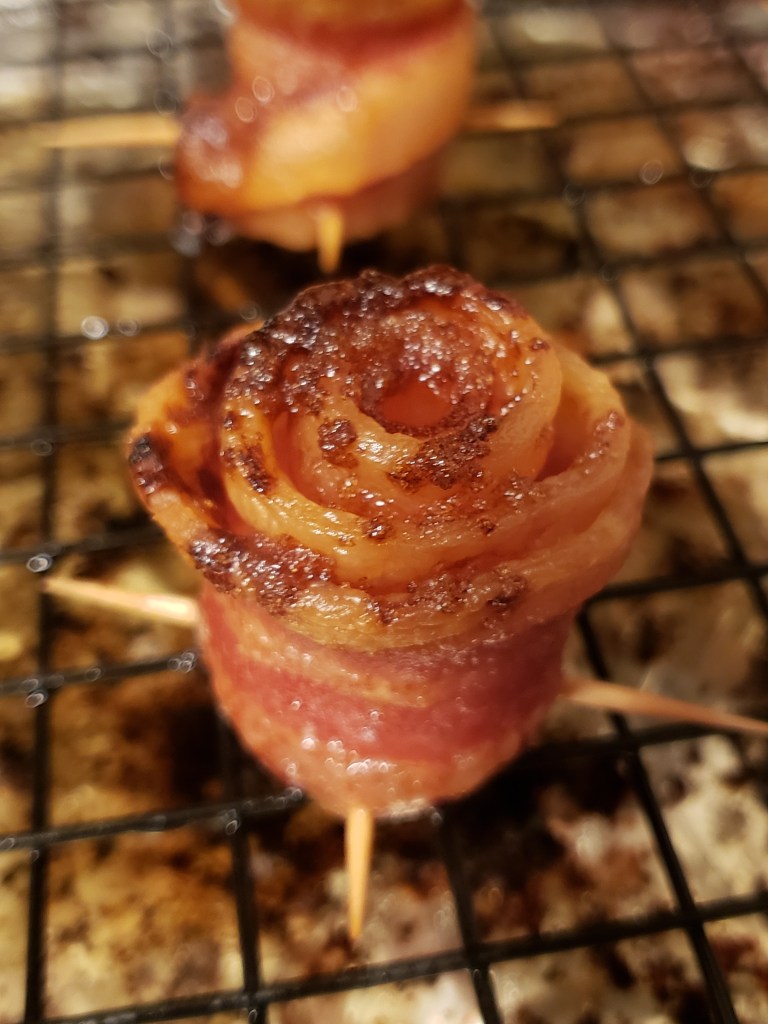
The hardest part was actually rolling and securing the roses with the toothpicks. None of the tutorials I looked at really had a good idea for that.
What I found, was that you should start from the flat side of the bacon strip (on the left of the picture) and roll it towards the narrow end (on the right side of the picture) making sure to keep the bottom of the bacon strip even. It is going to want to slide and not stay flat, but you need it flat in order for the tooth picks to hold it in place.
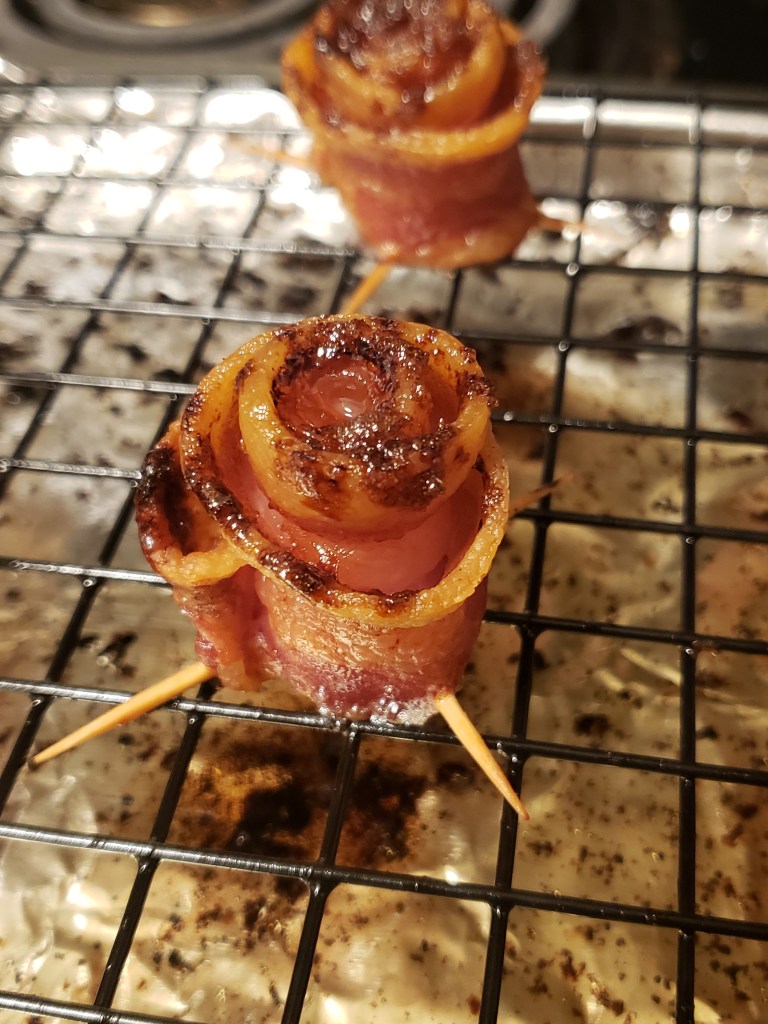
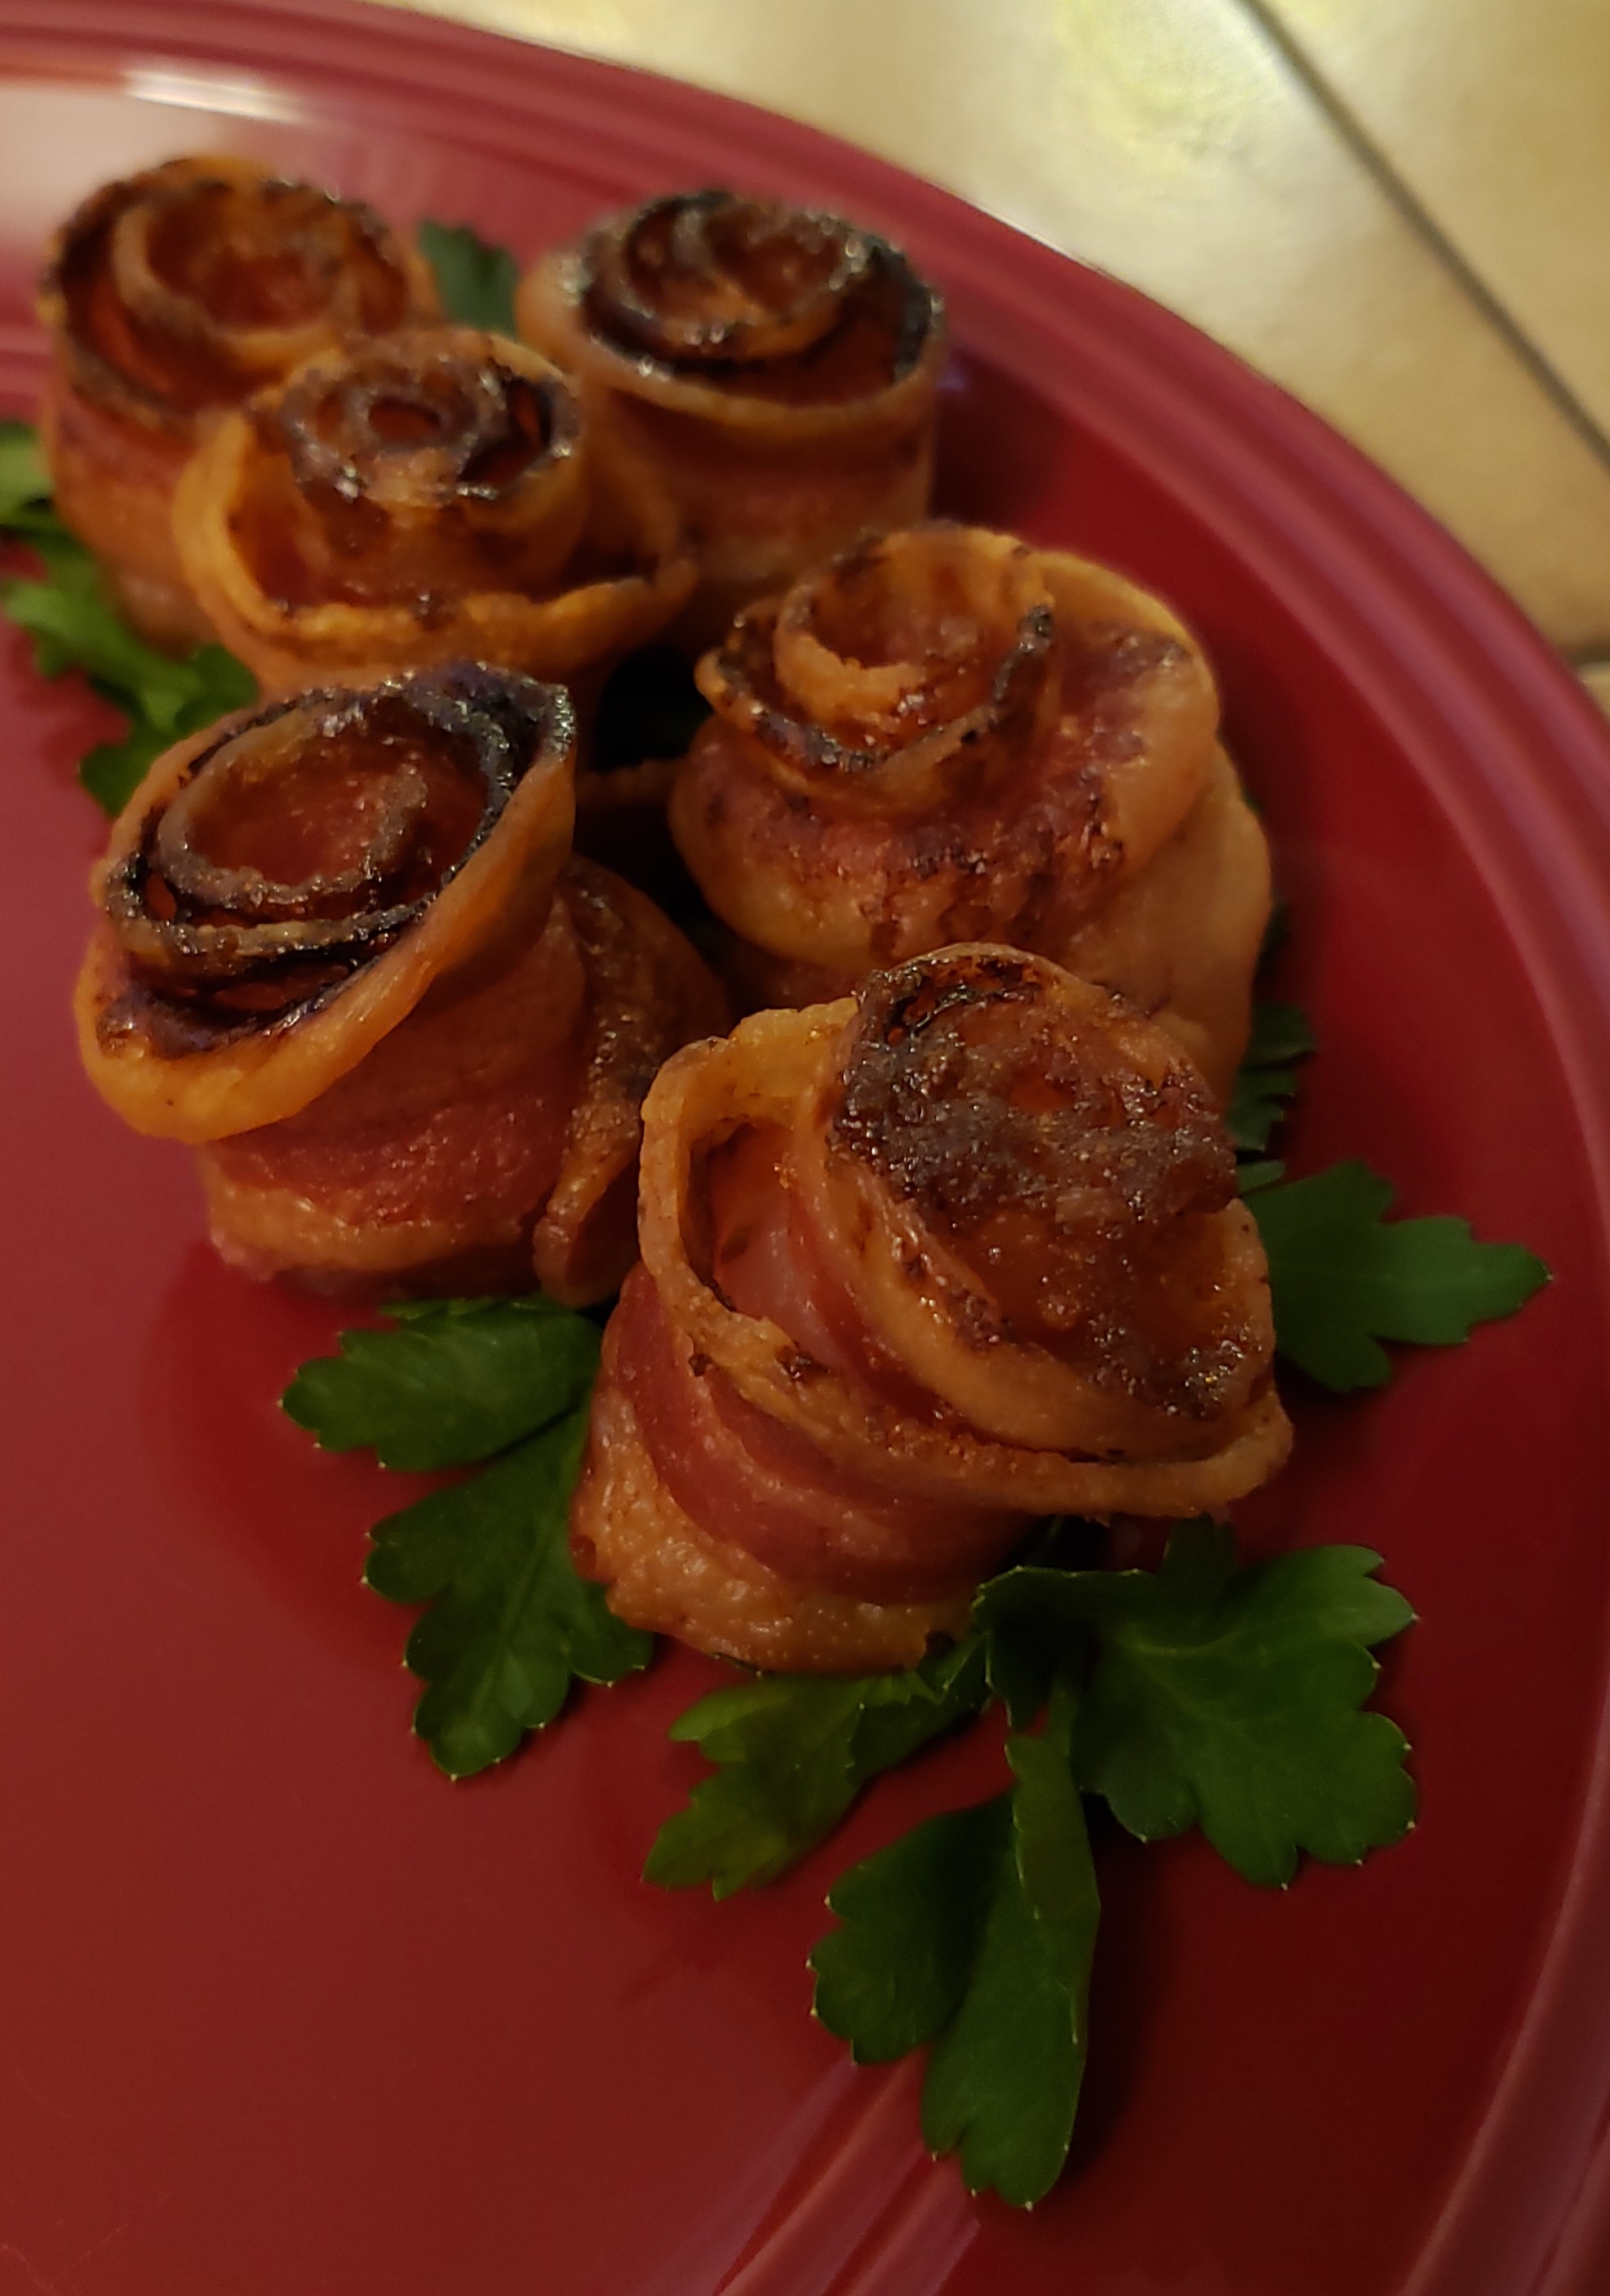
Once you have it rolled, you are going to use two tooth picks and shove them through the bottom of your rolled bacon strip. You will want to crisscross them, or at least that worked best for me. I also found it helped them to look more like roses if I pulled the “petals” apart gently once I had the roll secured with toothpicks. As you can see in the pictures, I attempted to just roll down the edges of the petals on a couple of them, and they really didn’t look like roses. So, I don’t really suggest that.
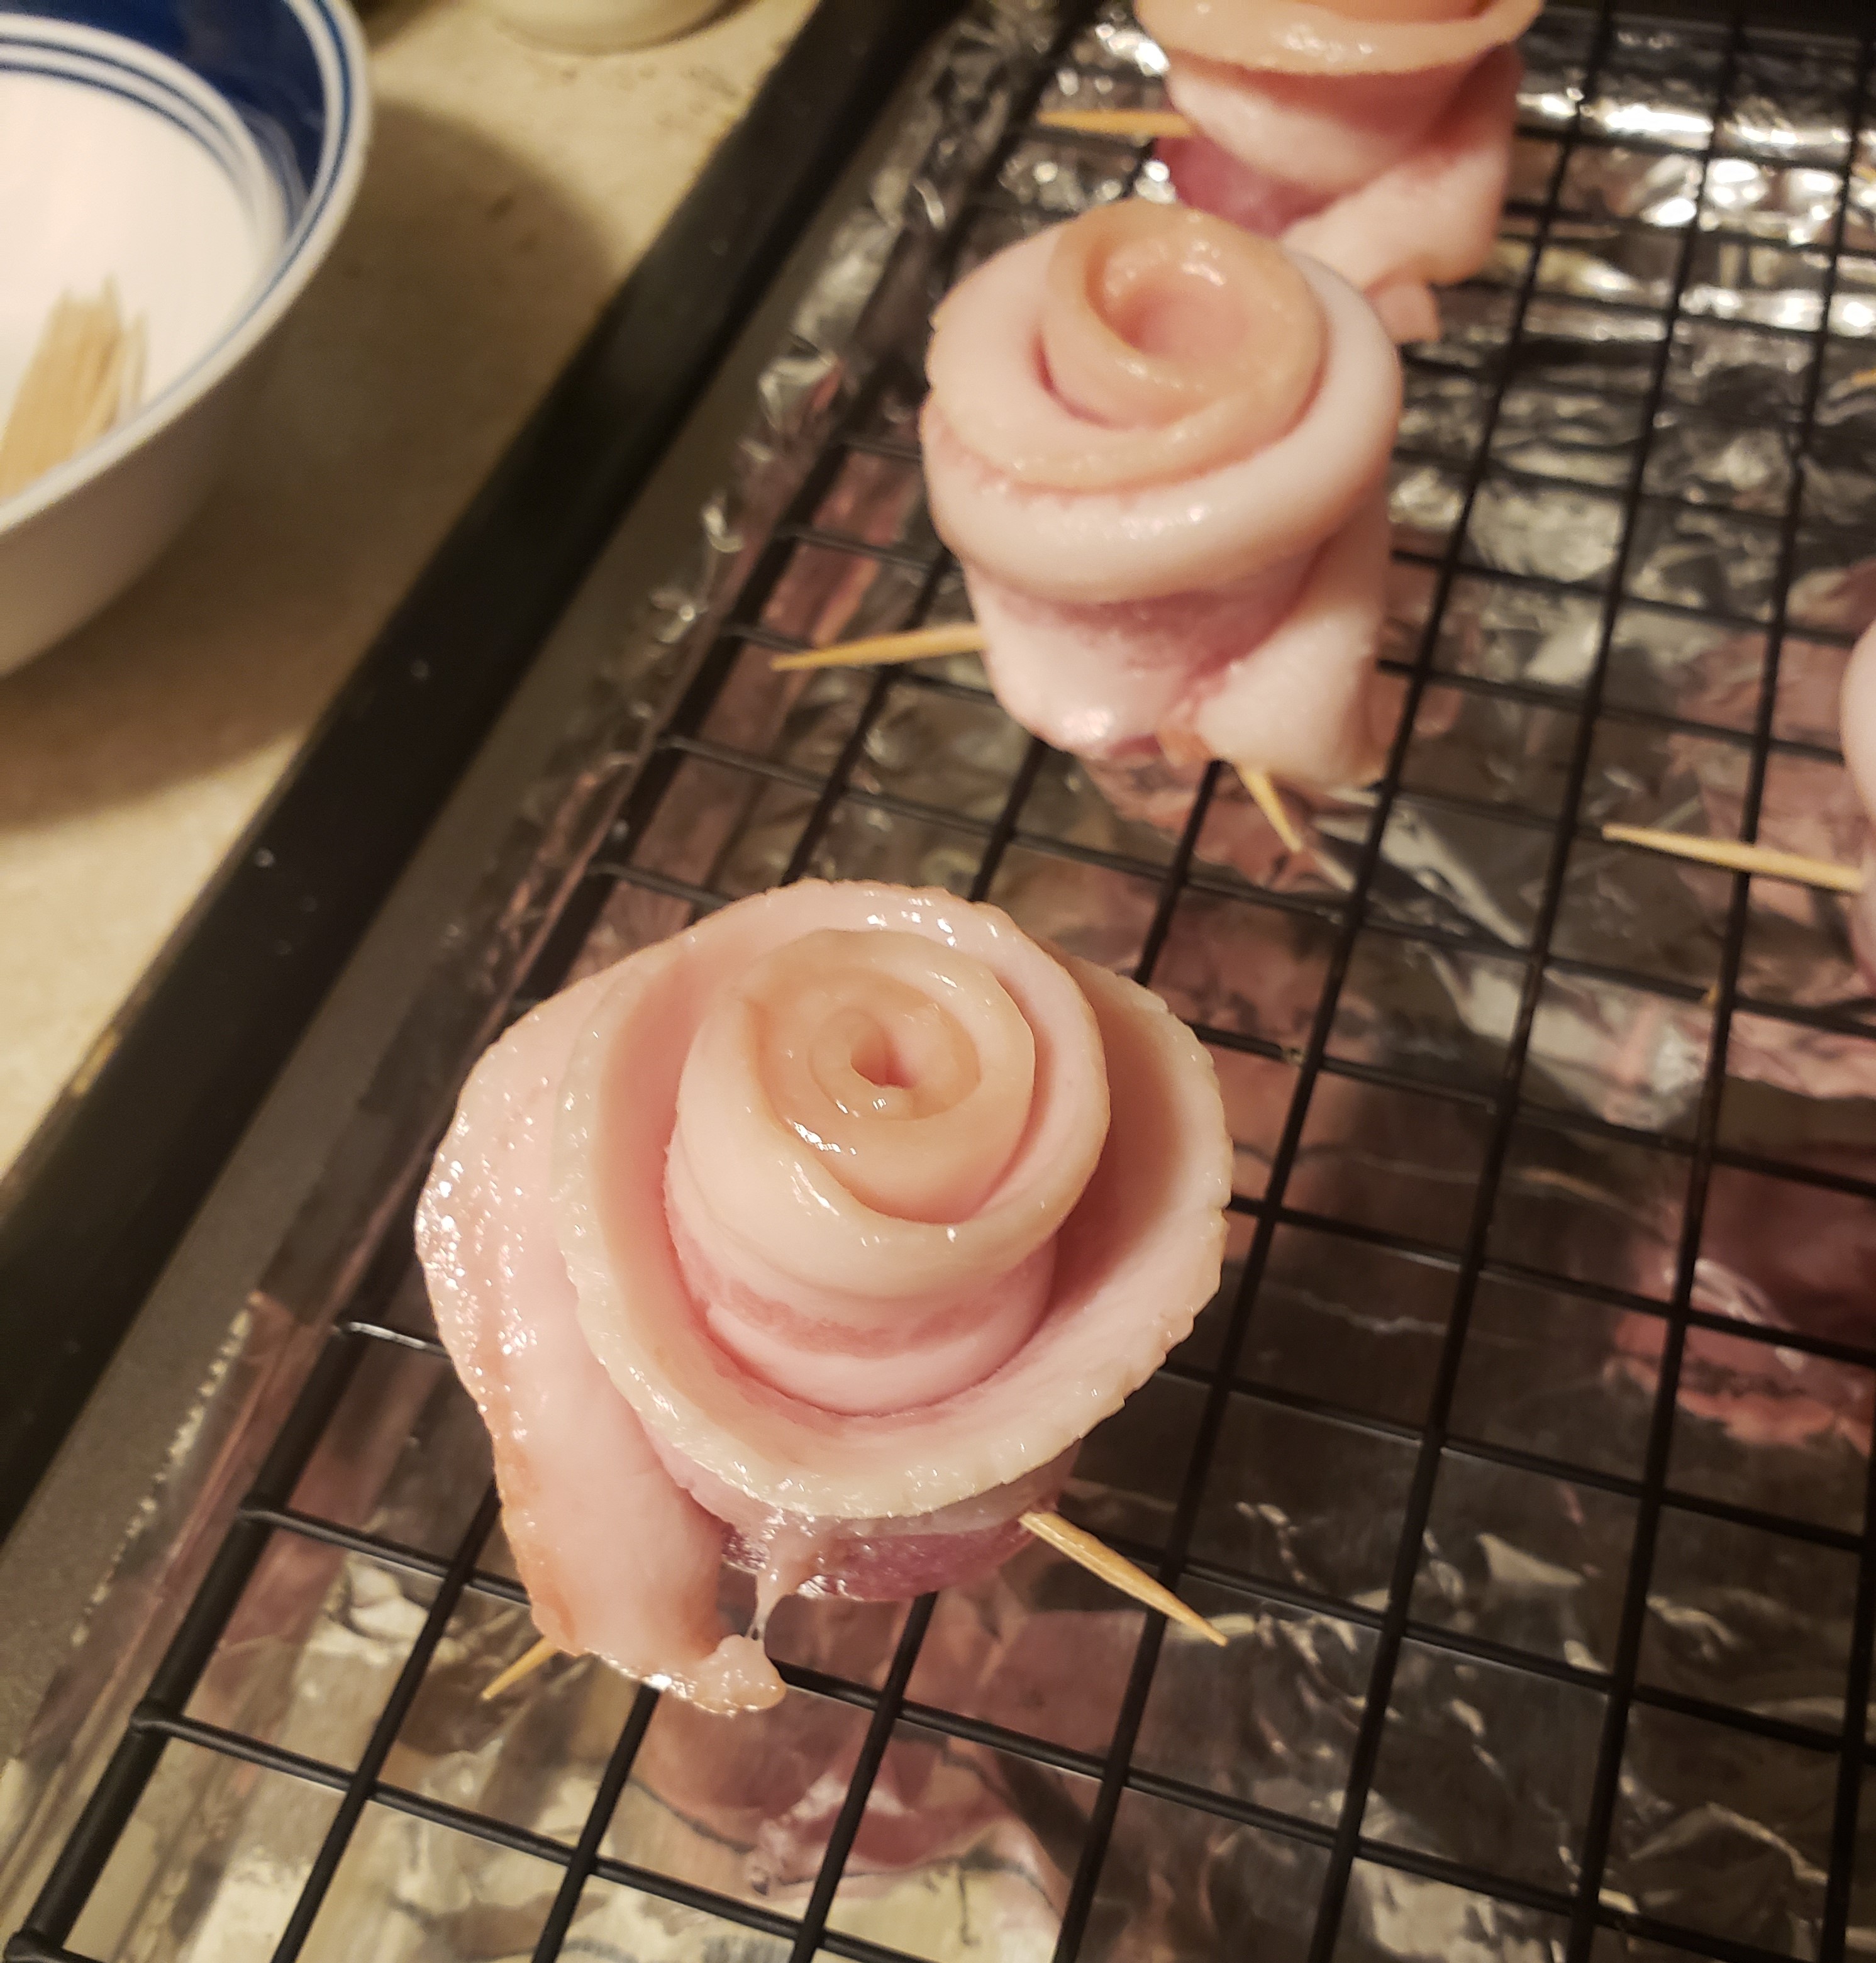
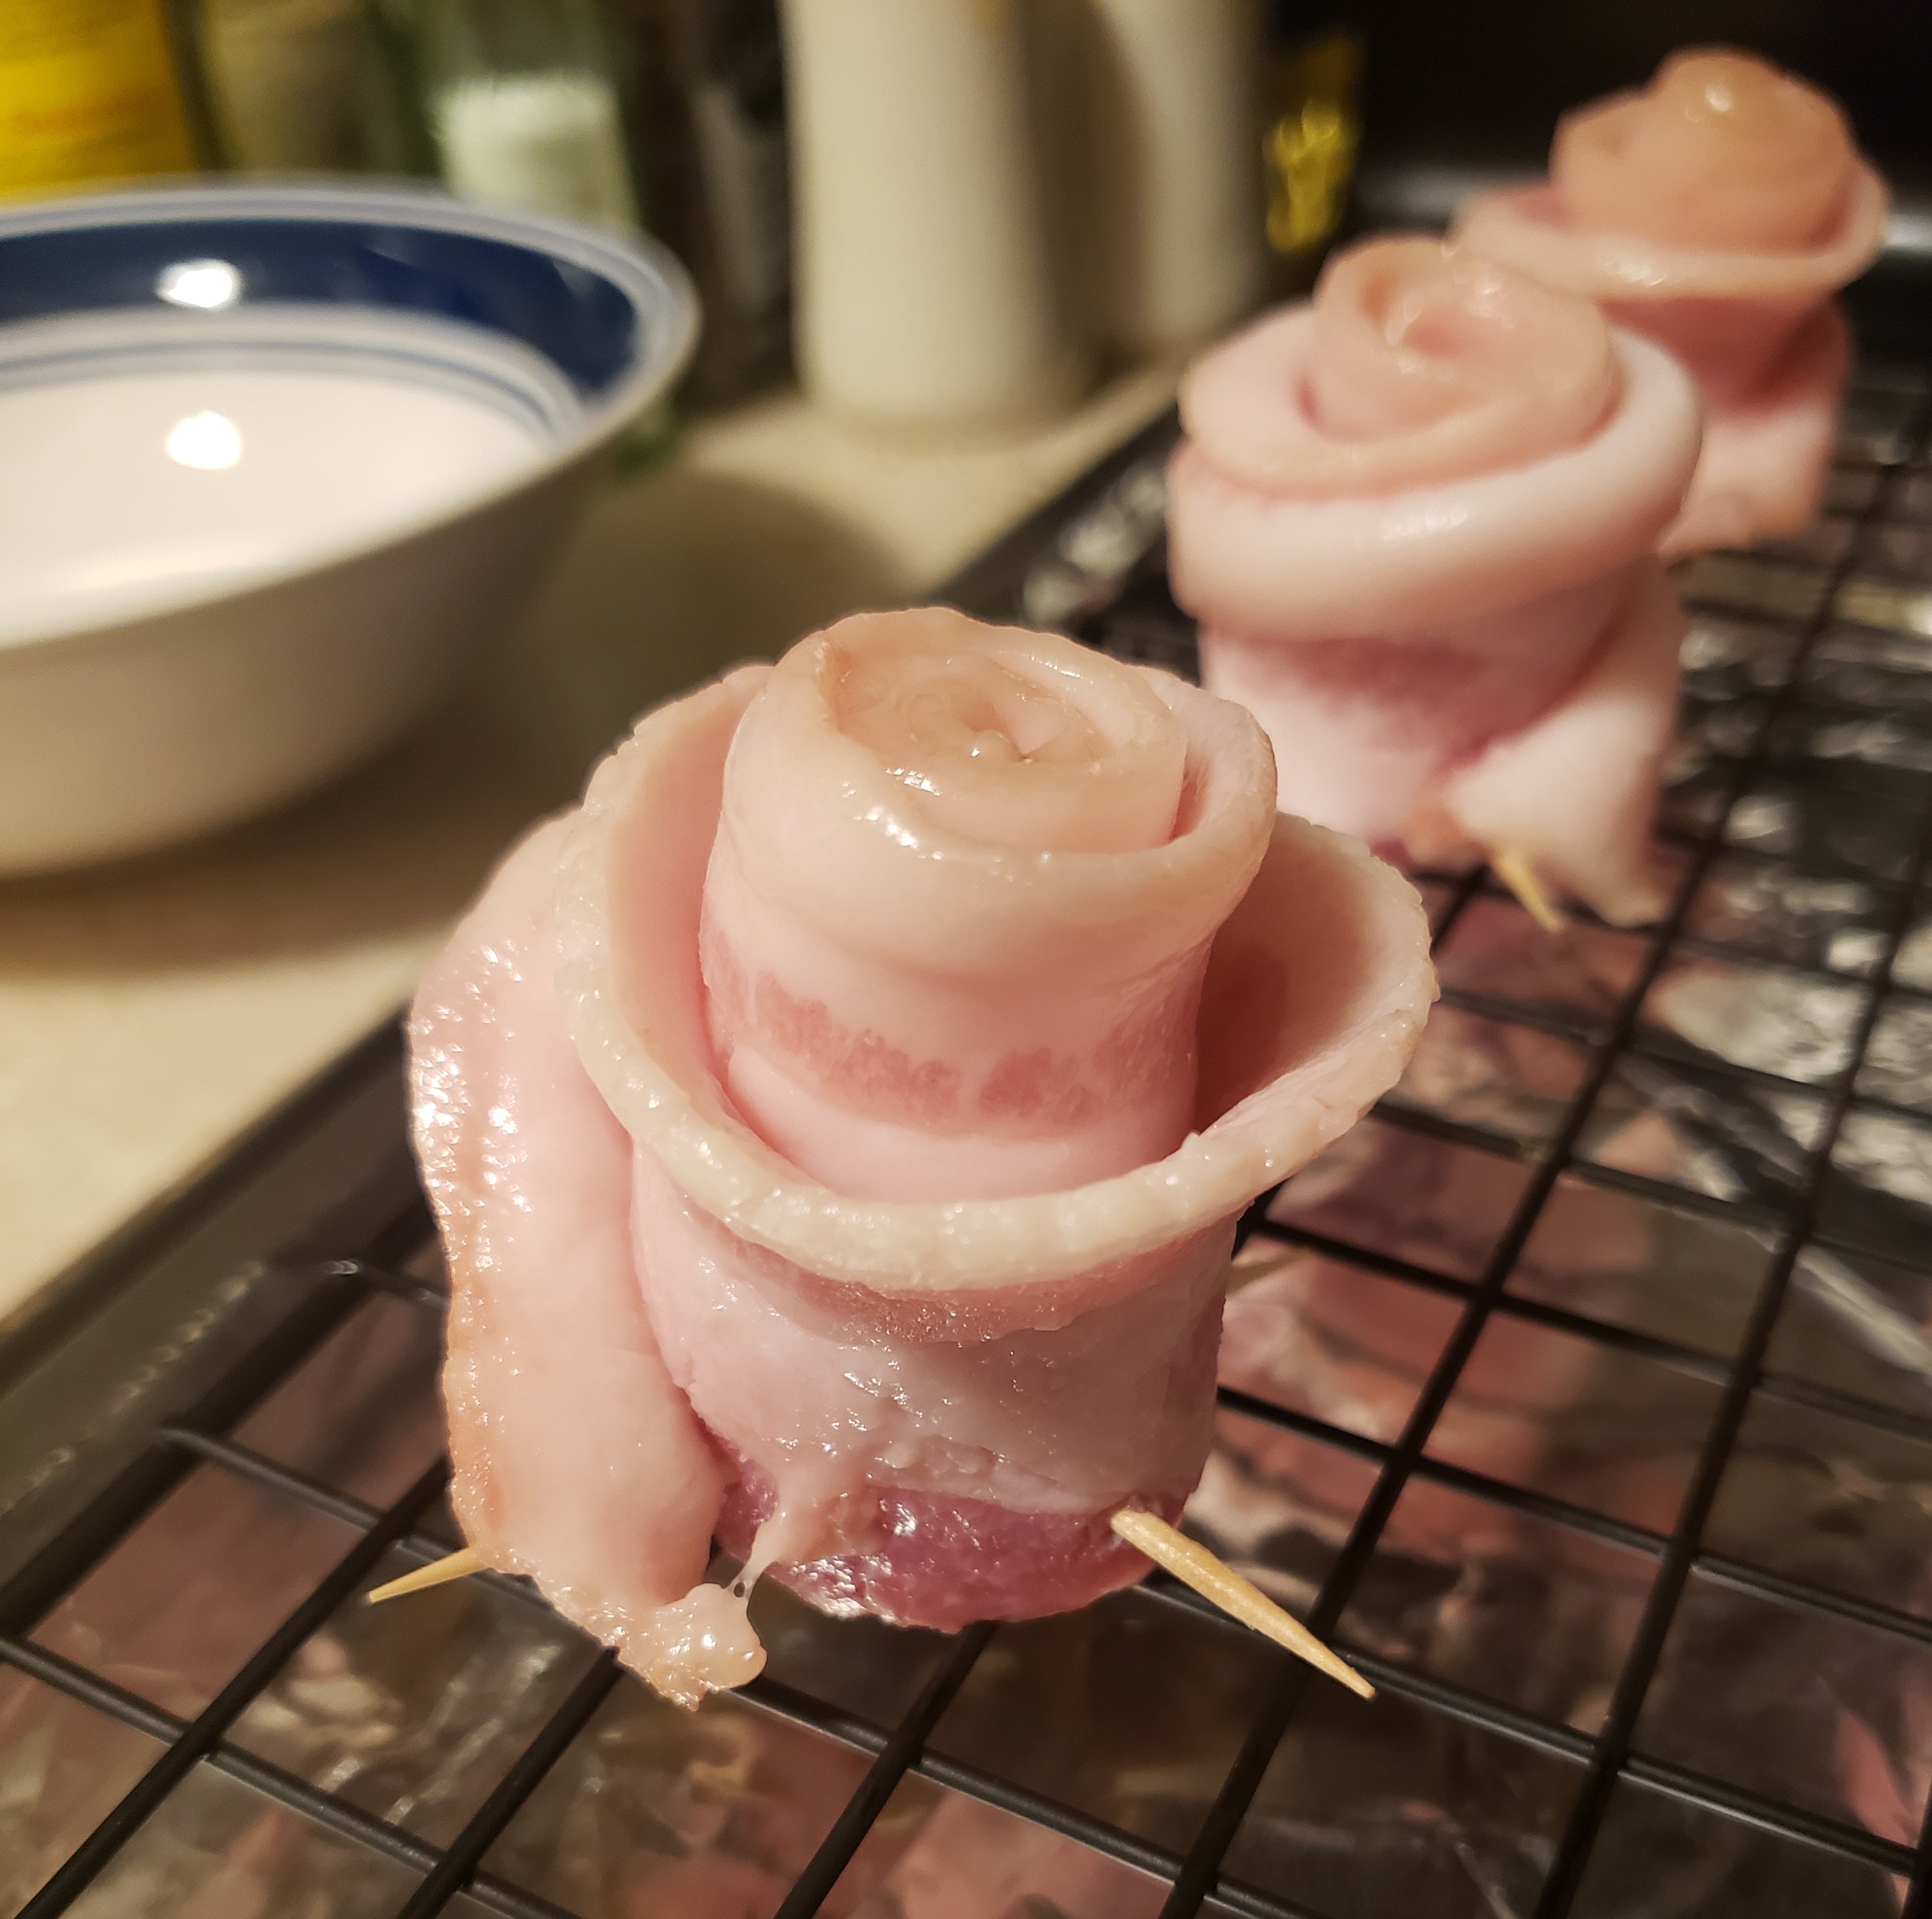

I tried sprinkling mine with a little bit of brown sugar before I put them in the oven as a little hint of sweet. They looked really nice with the brown sugar.
Unfortunately, I cooked them at too high of a temperature, so some of the sugar turned black when I pulled the cookie sheet out of the oven. (I think I cooked them at 350?) I would highly suggest cooking them at a lower temperature and just cook them longer (mine cooked for less than half an hour; just until they were nice and crispy to the touch).
I wasn’t super happy with how they all came out of the oven, but my boyfriend was waking up in a about 20 minutes, and I didn’t have much choice. So, I fried some eggs for him and scrambled some for me. Once that was done, all that was left was plating.
Now, I don’t know about you, but just seeing these roses by themselves isn’t very romantic. Granted, they were going to be alongside some nice eggs, but I wanted them to look prettier. So I made a nice bed of parsley leaves for them.
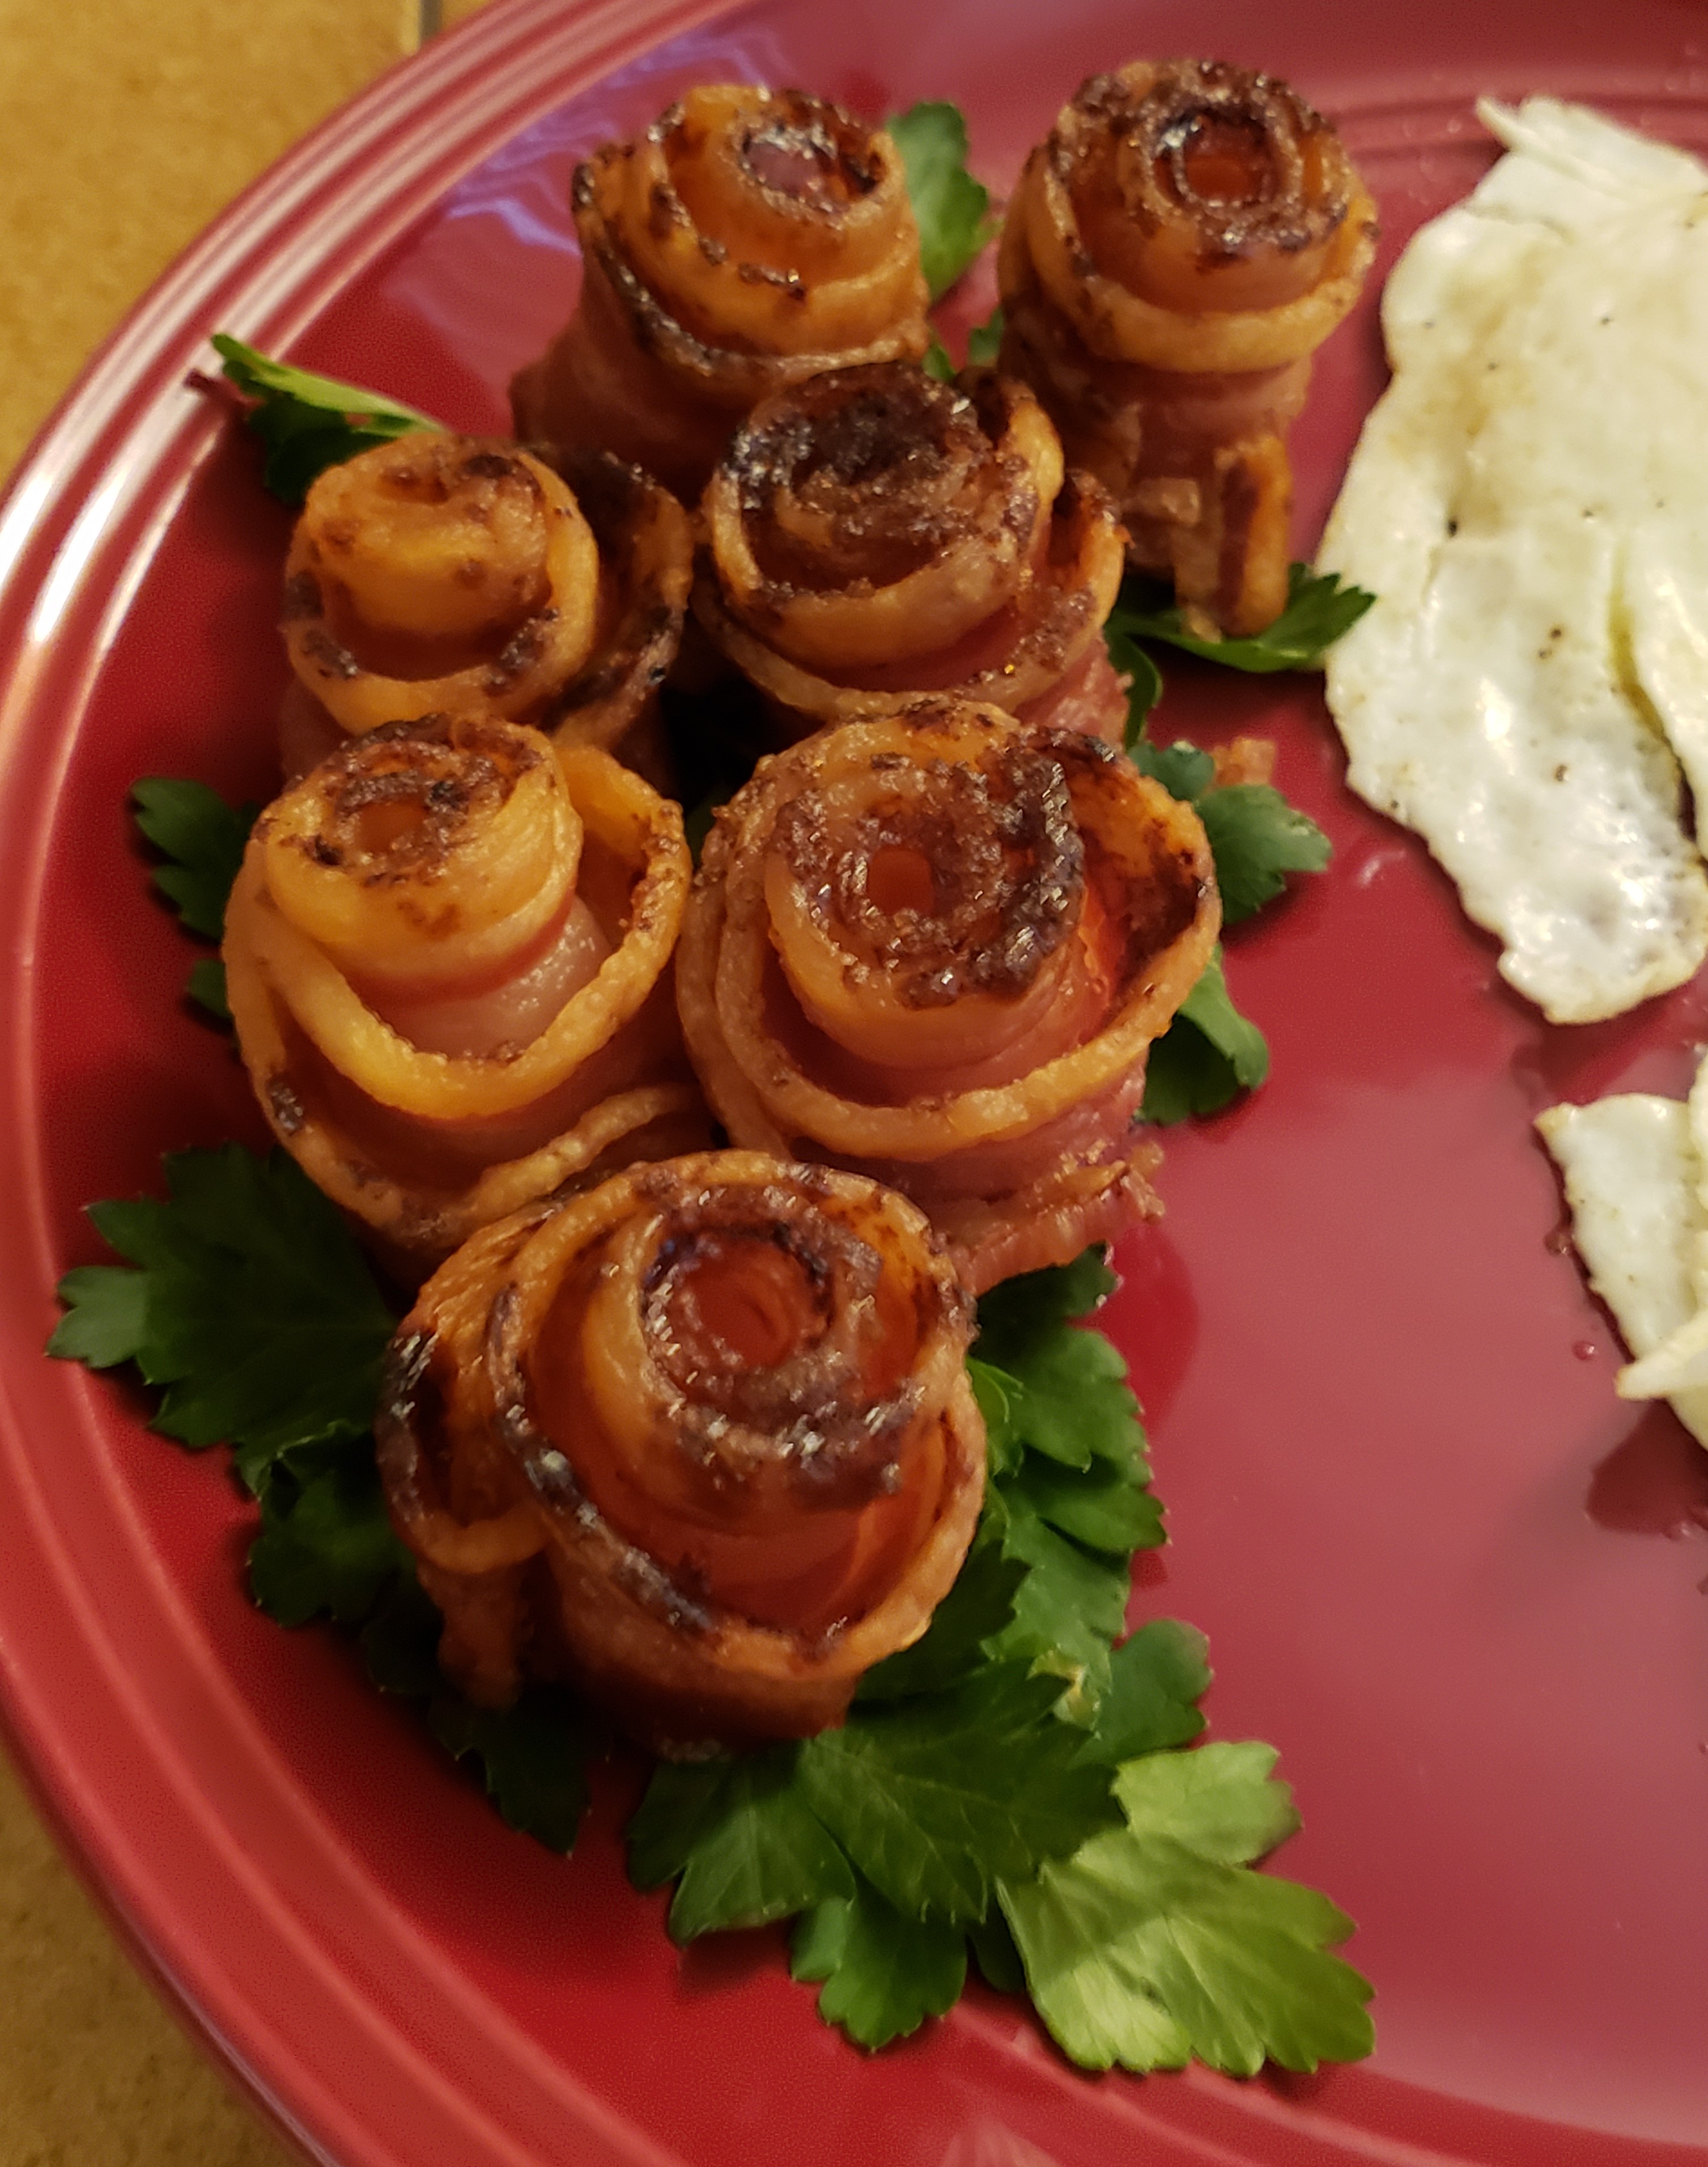
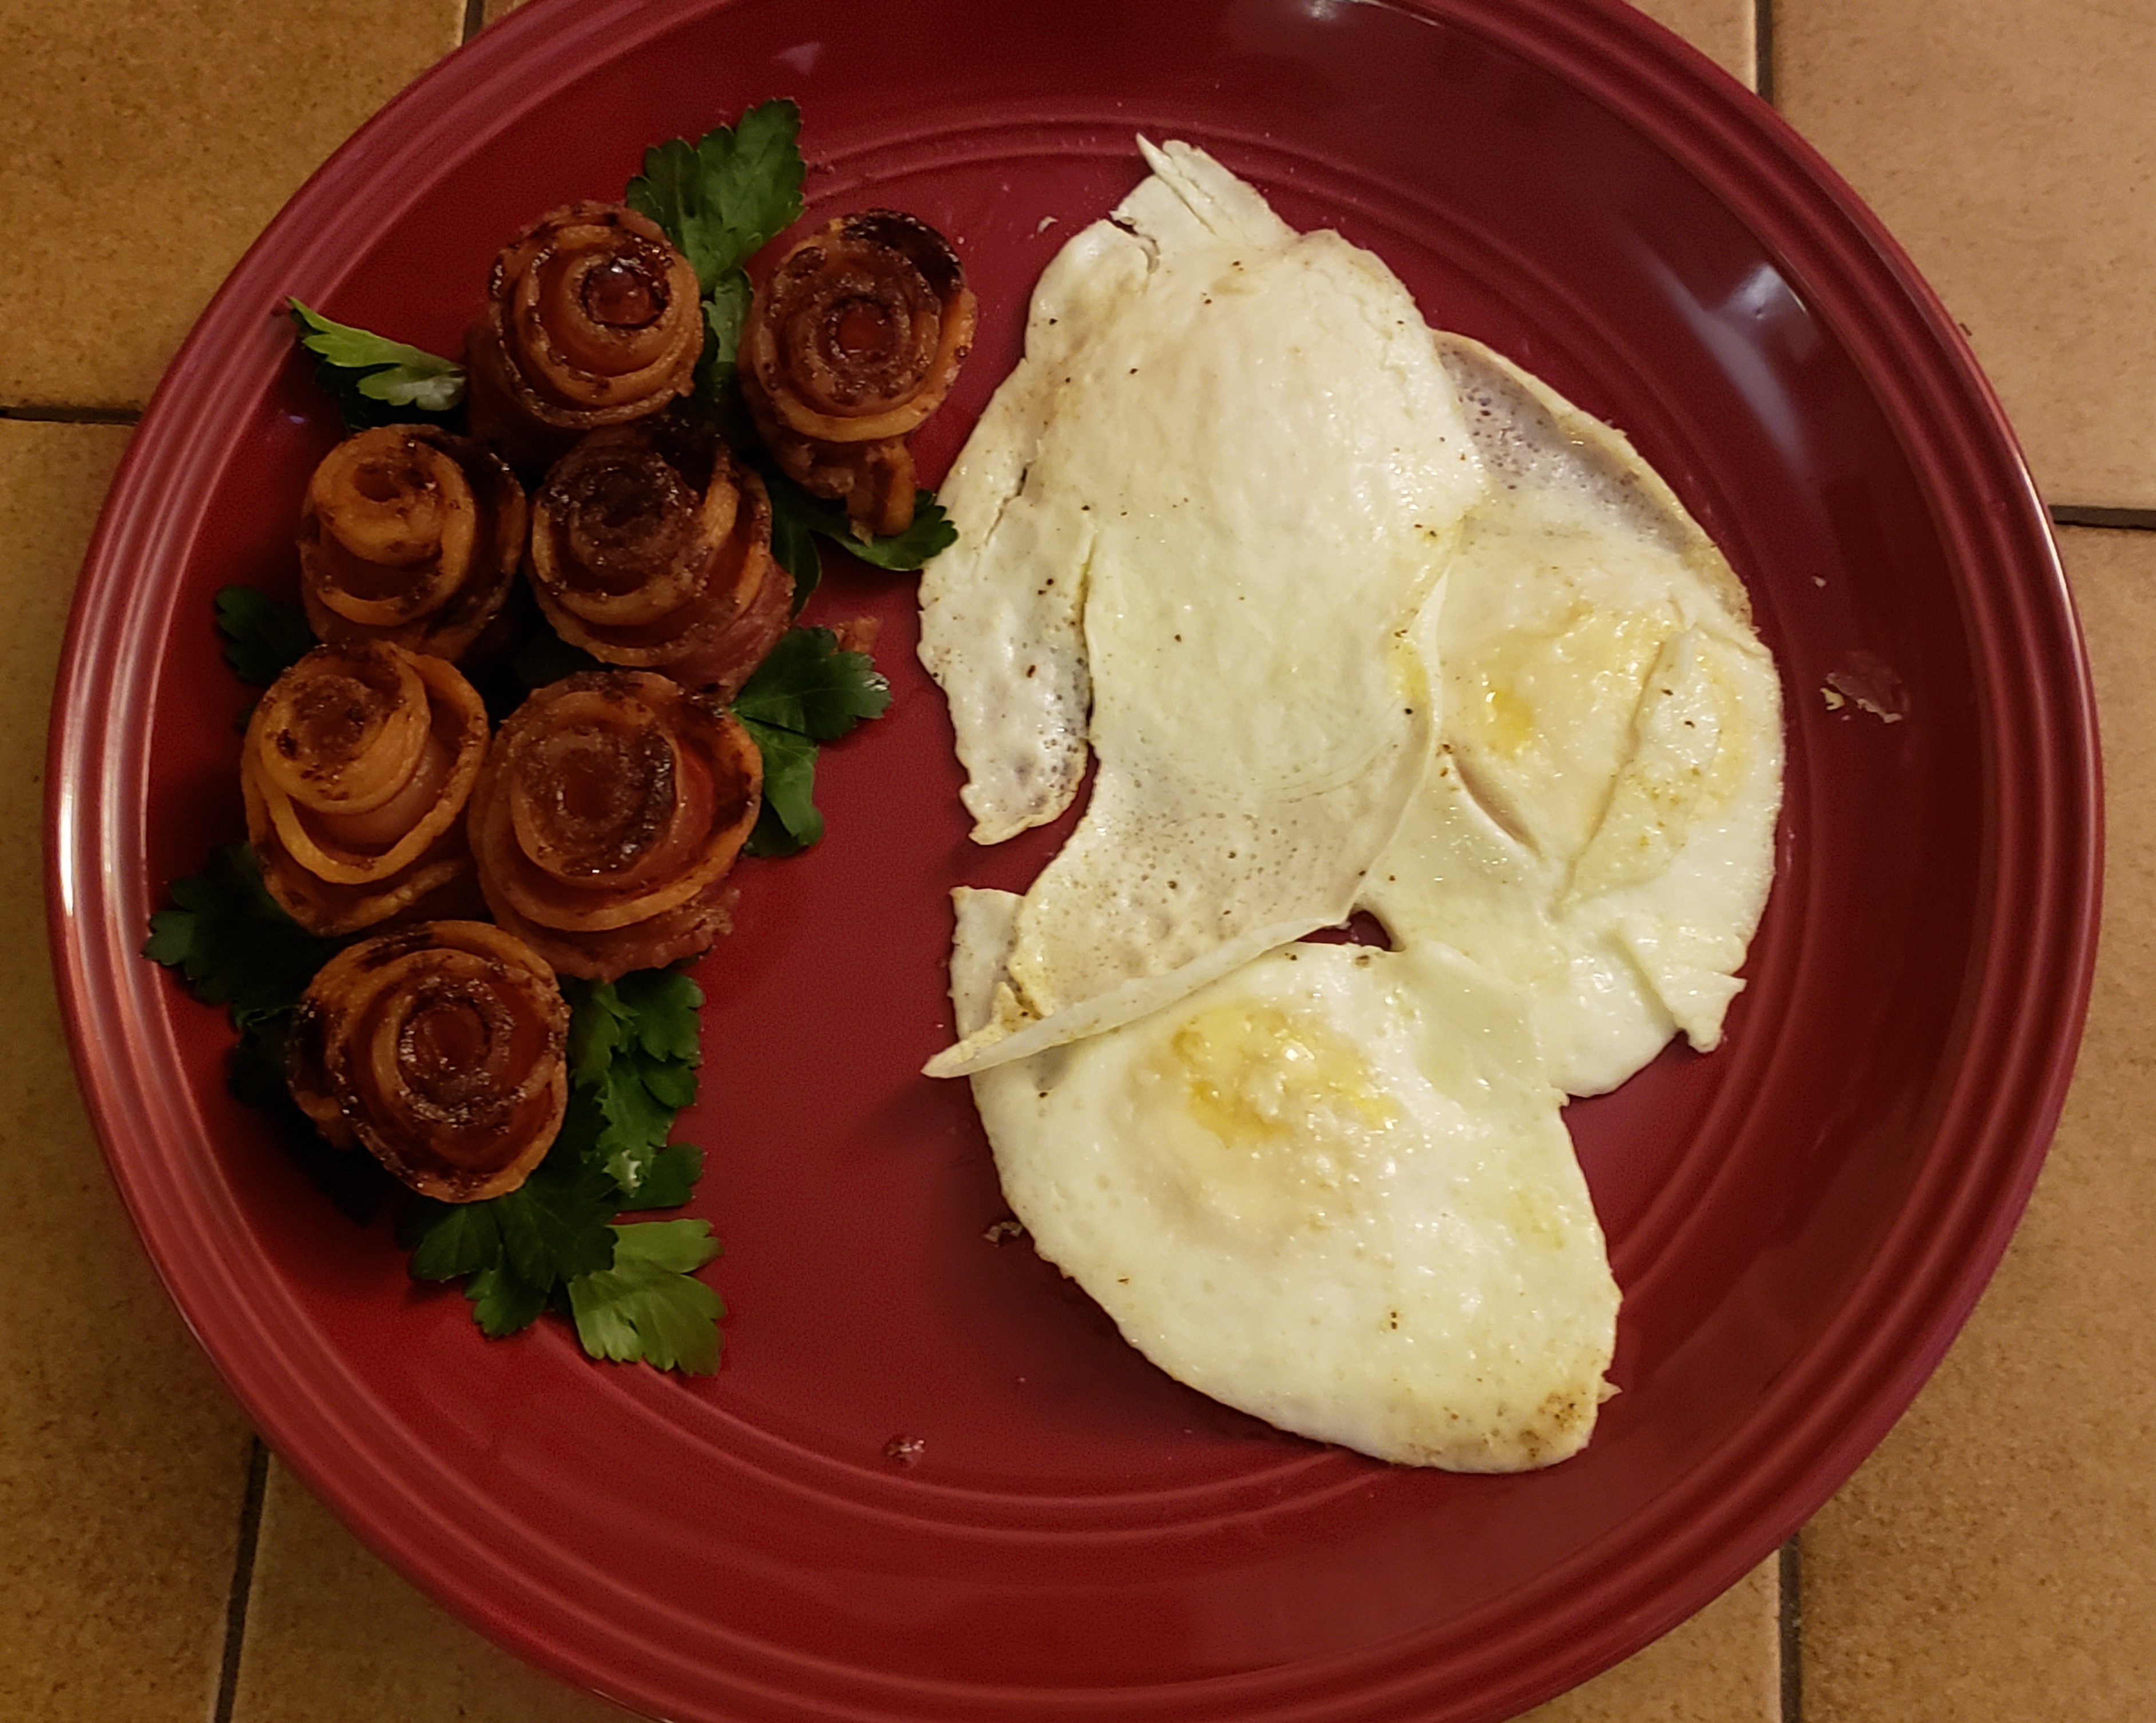
The overall look was actually quite pretty and surprisingly appetizing. Our red plates (which we both don’t care for) actually fit to make the roses quite photogenic. (The over-hard eggs were a little lack-luster, but they were my first try ever cooking eggs that way.)
When he came out for breakfast, he was so surprised, excited, happy, and unsure how to appropriately say thank you. (Apparently he’s not used to someone who does cute things for him…) We had a wonderful brunch followed by a great rest of the day ax throwing and then going to my favorite restaurant for dinner.
In the end, these were a little tricky to make, but totally worth it in the end. Even the brown sugar that made them look burnt tasted really good.
Any questions, comments, concerns? Let me know!
Thanks for reading.
-Jo
Bacon Roses Recipe

Ingredients:
- One 12 oz Pack of Bacon
- Toothpicks
- Light Brown Sugar
- Fresh Parsley
Directions:
- Preheat oven to 350 degrees Fahrenheit (around 175-177 degrees Celsius).
- Line a cookie sheet with aluminum foil and place an oven safe wire cooling rack on top of the cookie sheet.
- Roll the bacon strips starting from the flat side and working towards the narrow side, making sure to keep the bottom of the roll as flat as possible.
- Secure the rolled bacon strip with crisscrossed toothpicks through bottom third of the rose.
- Gently separate some of the rolled layers on the top of the rose to give the impression of “petals.”
- Sprinkle roses with brown sugar.
- Bake in the oven for 20-30 minutes or until the desired crispiness is reached.
- Remove the toothpicks and plate on top of a bed of parsley leaves.

Leave a comment